Remux Setup Guide
Install Remux with Docker and complete the initial setup.
Caddy Setup Guide (Optional)
Set up a reverse proxy and expose Remux over the internet.
Remux Core Concepts
Understand addons, tasks, content, IPTV, and streaming in Remux.
Prerequisites
Remux is packaged as a Docker container. If you haven't already, install Docker on your server.
Step 1: Create the Docker Compose File
First (from your desired root folder) create the directory for Remux:
mkdir remux
cd remux
Choose the configuration (for the docker-compose.yml file) that matches how you want to access Remux.
Option A: With the Caddy reverse proxy
Use this configuration if you completed the Caddy setup guide. Remux is available to Caddy through the shared Docker network and port 3000 is not published on the host.
services:
  remux:
    image: ghcr.io/lostb1t/remux:nightly
    environment:
      - PUID=1000                       # Replace with your user ID (run 'id -u' to check)
      - PGID=1000                       # Replace with your group ID (run 'id -g' to check)
    volumes:
      - ./data:/data
    devices:
      - /dev/dri:/dev/dri               # Required for hardware acceleration/transcoding
    group_add:
      - "105"                           # Replace with your render group (run 'getent group render')
    security_opt:
      - seccomp:unconfined
    networks:
      - caddy-net                      # Shared external network created in the Caddy setup guide
    restart: unless-stopped

networks:
  caddy-net:
    external: true
Option B: Without the Caddy reverse proxy
Use this configuration for direct access to Remux. It publishes Remux on port 3000 and does not require the external Caddy network.
services:
  remux:
    image: ghcr.io/lostb1t/remux:nightly
    ports:
      - "3000:3000"                    # Change the left port if 3000 is already in use
    environment:
      - PUID=1000                       # Replace with your user ID (run 'id -u' to check)
      - PGID=1000                       # Replace with your group ID (run 'id -g' to check)
    volumes:
      - ./data:/data
    devices:
      - /dev/dri:/dev/dri               # Required for hardware acceleration/transcoding
    group_add:
      - "105"                           # Replace with your render group (run 'getent group render')
    security_opt:
      - seccomp:unconfined
    restart: unless-stopped
Configuration Notes
| Setting | Purpose |
|---|---|
image: nightly | Remux is actively developed; use :latest for stability instead |
PUID / PGID | Ensures correct file permissions; run id -u and id -g to get your values |
/dev/dri | Enables GPU hardware acceleration for transcoding |
group_add: "105" | GPU access group; run getent group render to verify the correct group ID |
caddy-net | Connects Remux to Caddy without publishing port 3000 on the host |
Step 2: Start the Container
Pull the container image and start the service:
docker compose up -dWith Caddy, open the domain configured in your Caddyfile. Without Caddy, open http://localhost:3000 or replace localhost with the server's IP address.
Step 3: Initial Setup Wizard
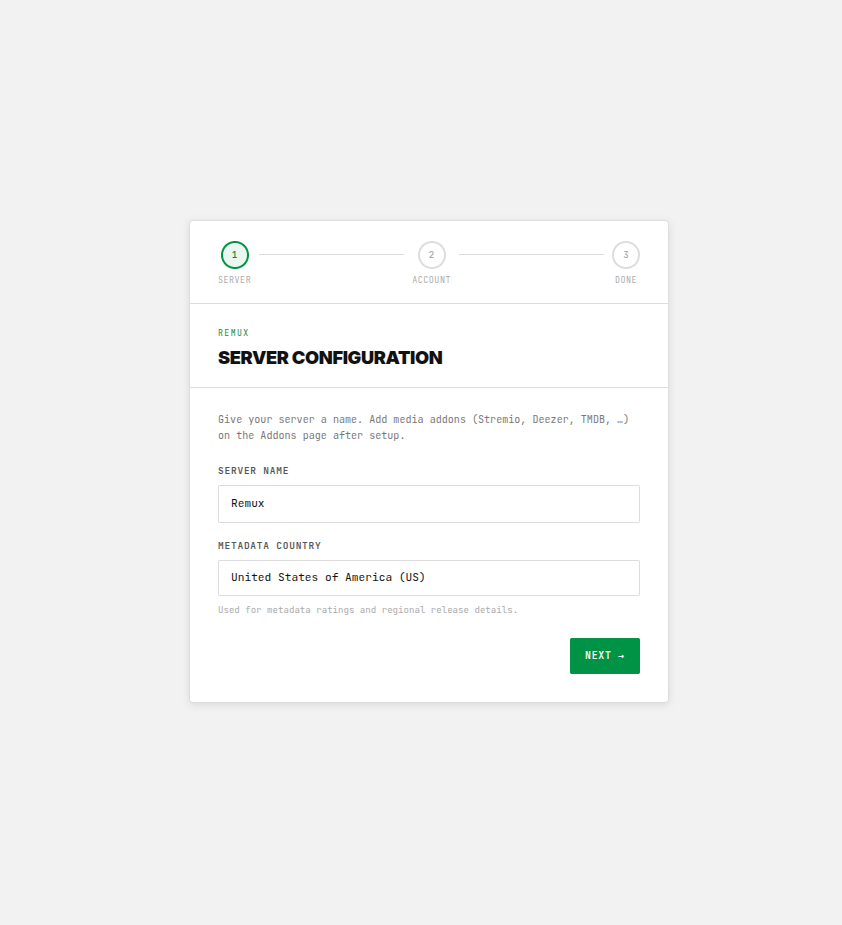
1. Set Your Server Name
Enter a name for your Remux instance. This identifies your server.
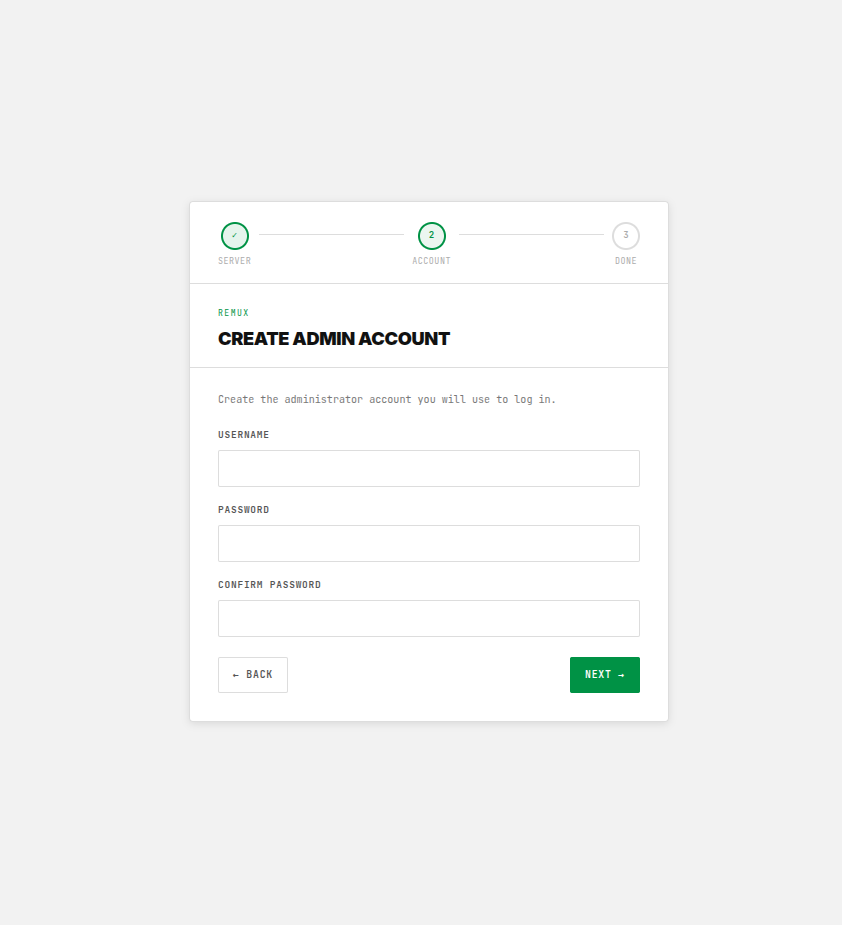
2. Create Your Admin Account
Set up your admin credentials for dashboard access.
3. Click Finish
You'll be redirected to the main dashboard.
Step 4: Connect AIOStreams Addon
Add the Addon
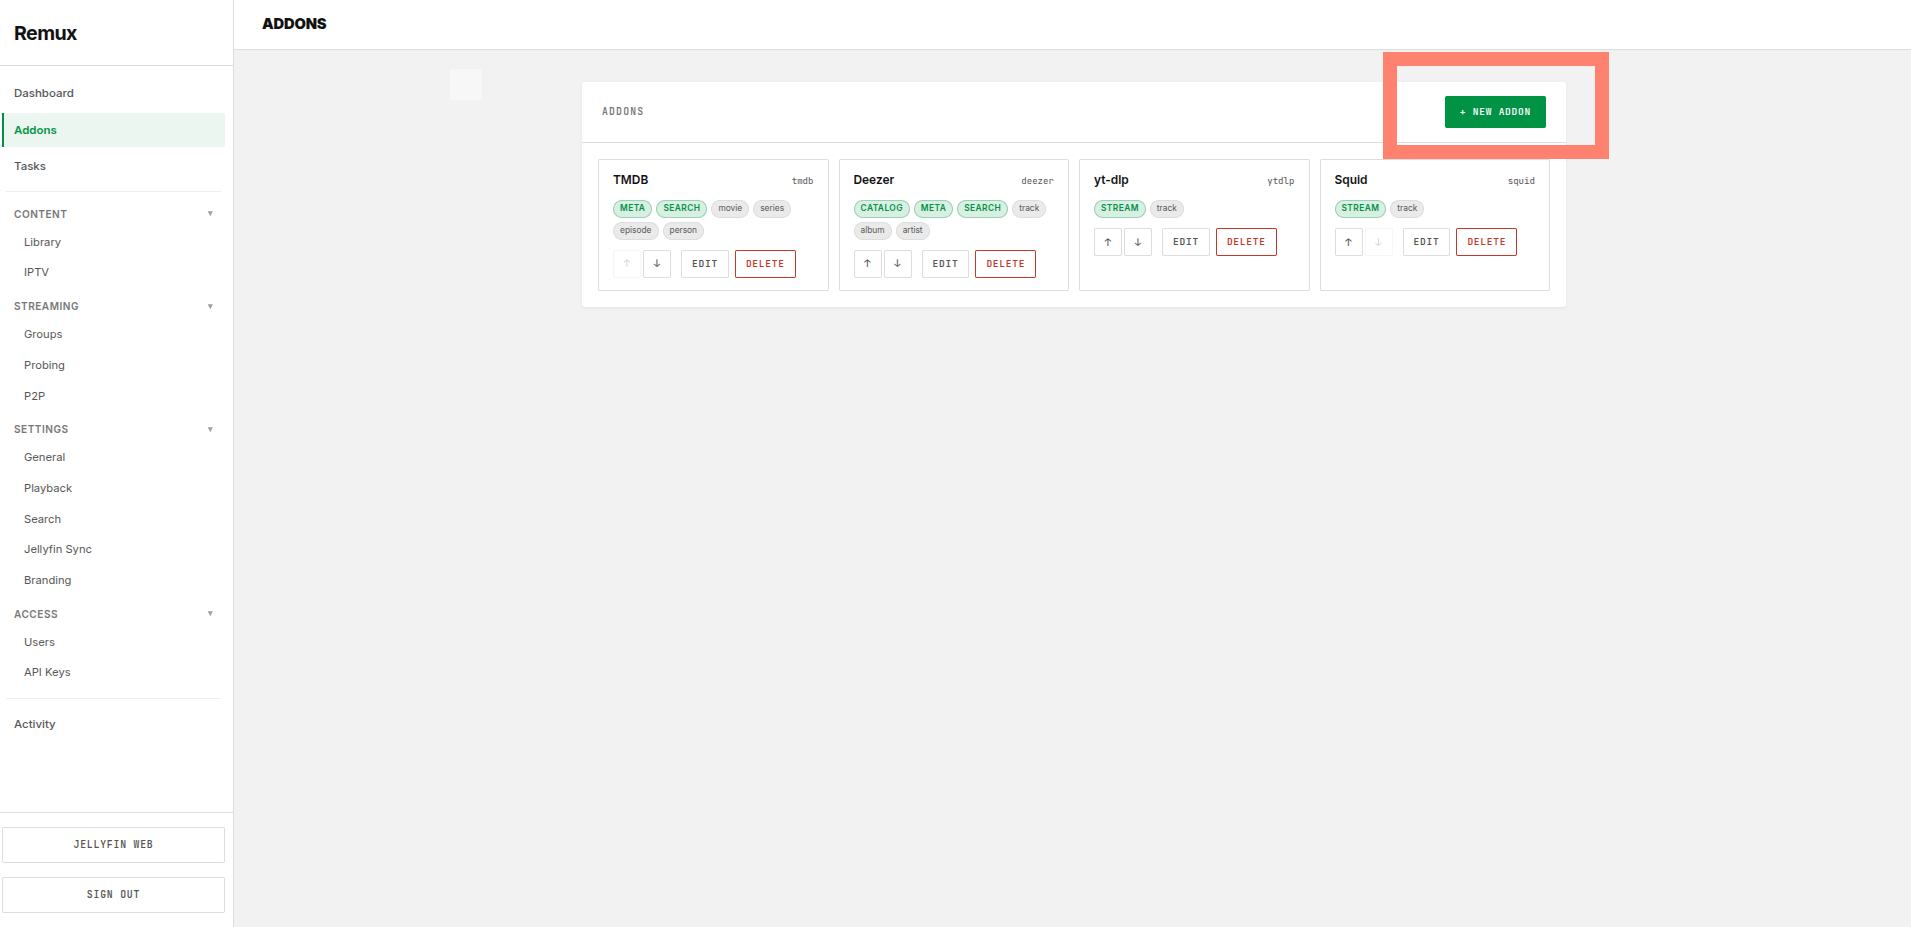
- From the left sidebar, click Addons
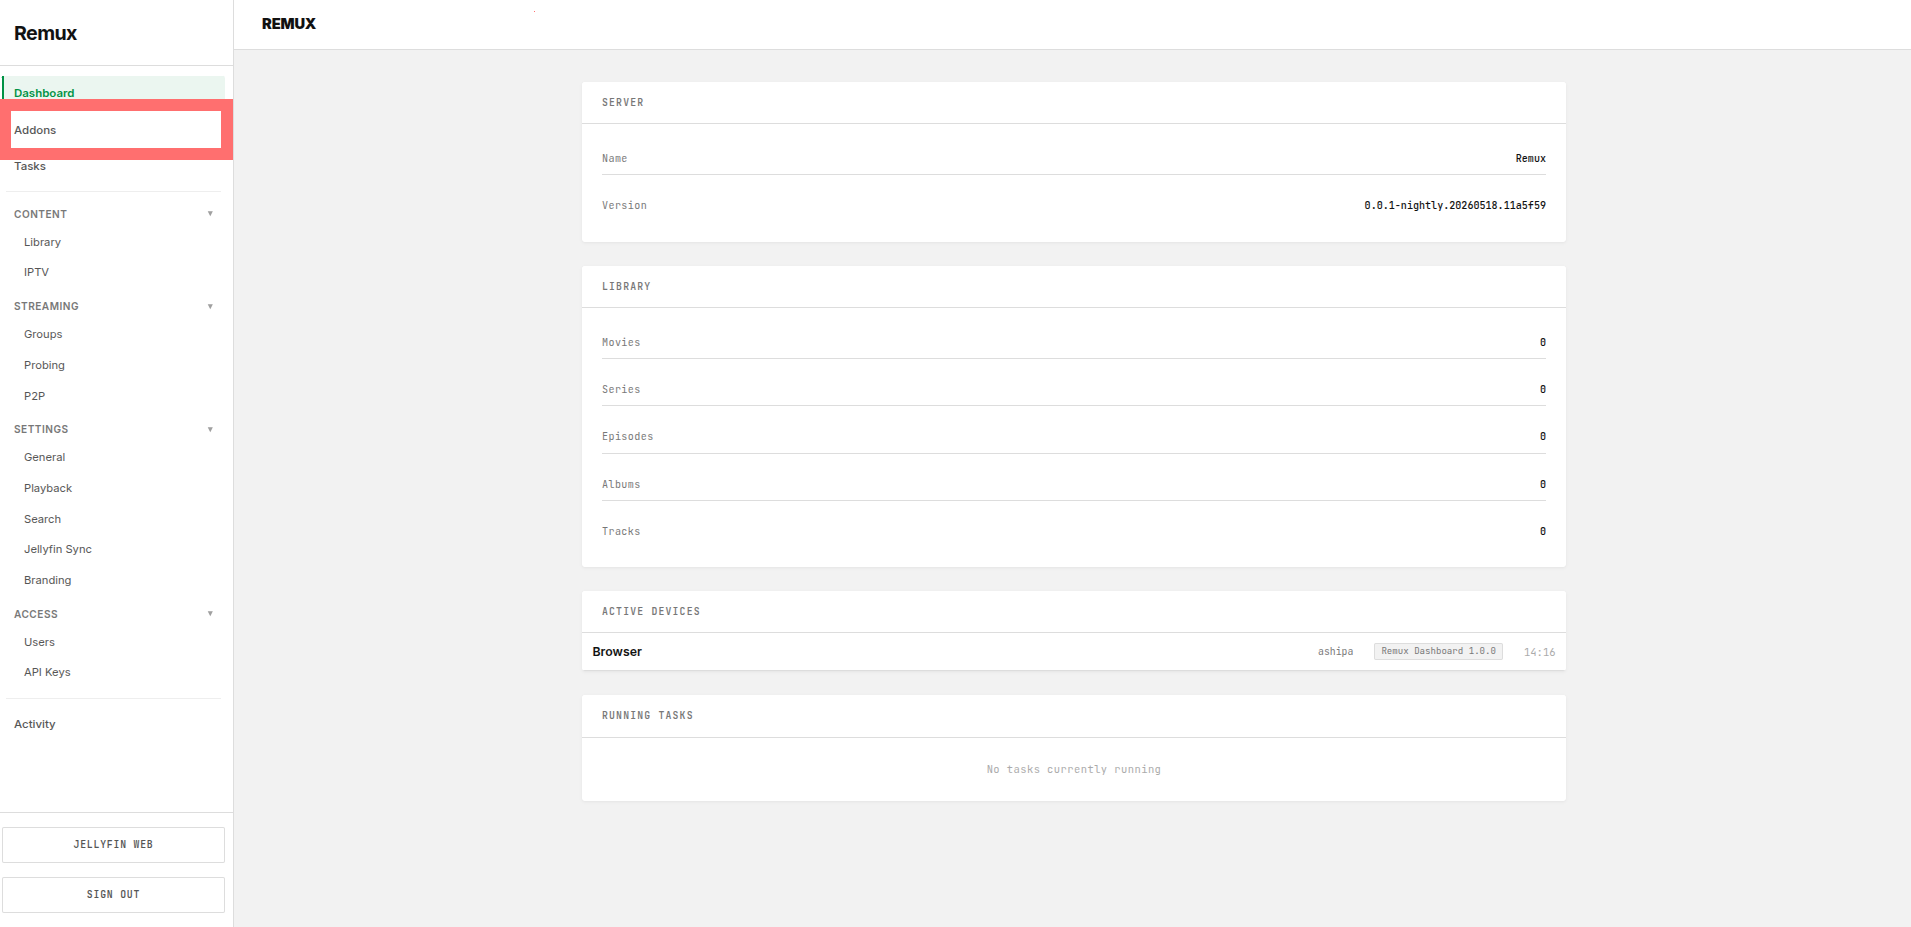
- Click New Addon
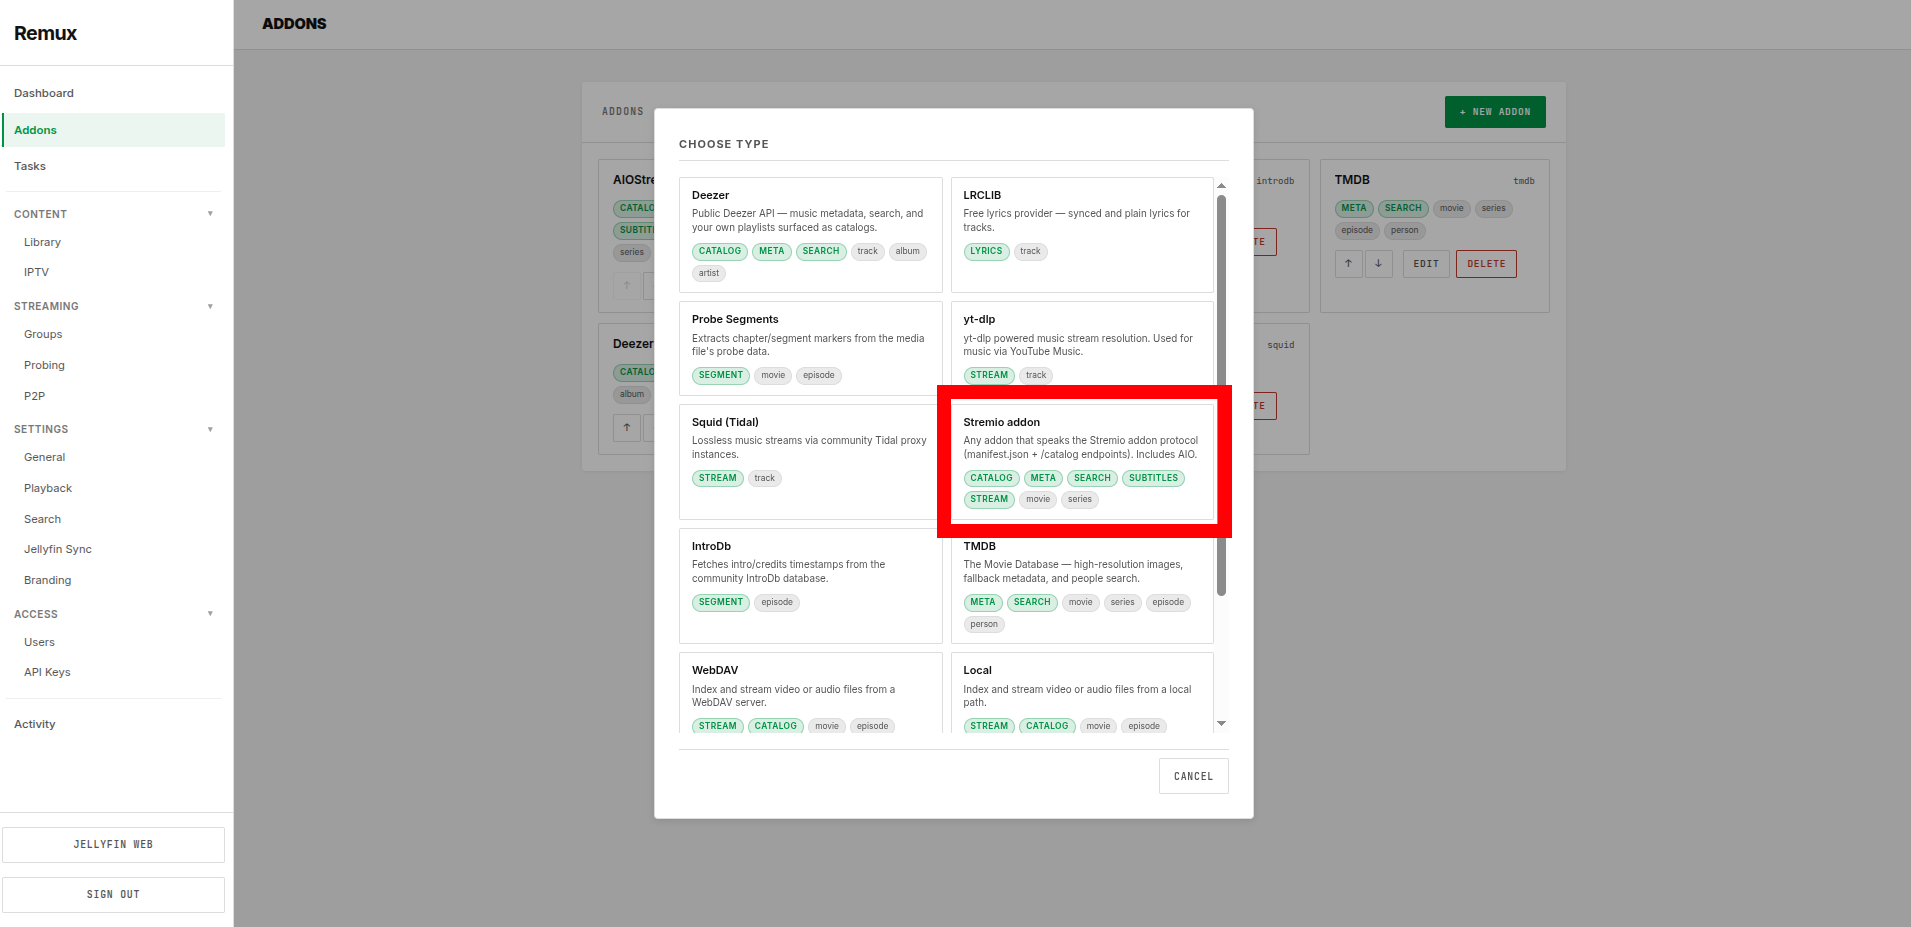
- Select Stremio Addon and click Configure
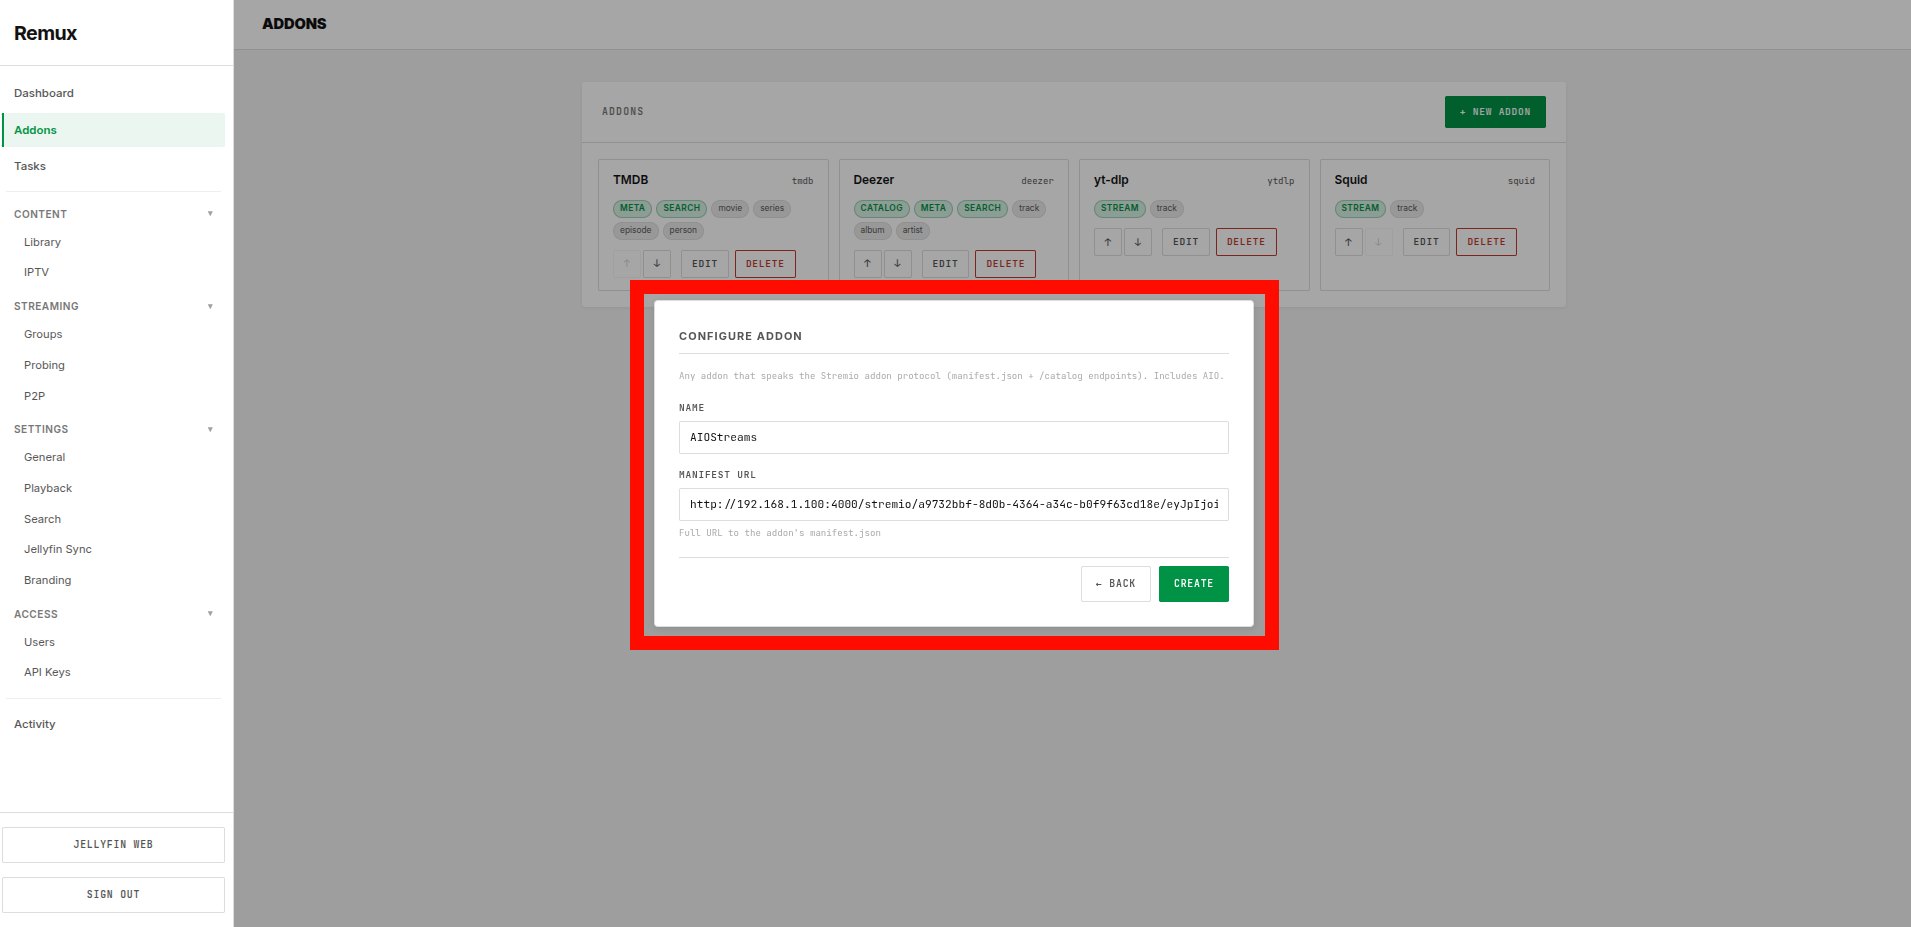
Configure AIOStreams
- Name: Change to
AIOStreams(or your preferred name) - Manifest URL: Paste your AIOStreams
manifest.jsonURL- Example:
https://aiostreams.elfhosted.com/manifest.json
- Example:
- Click Create
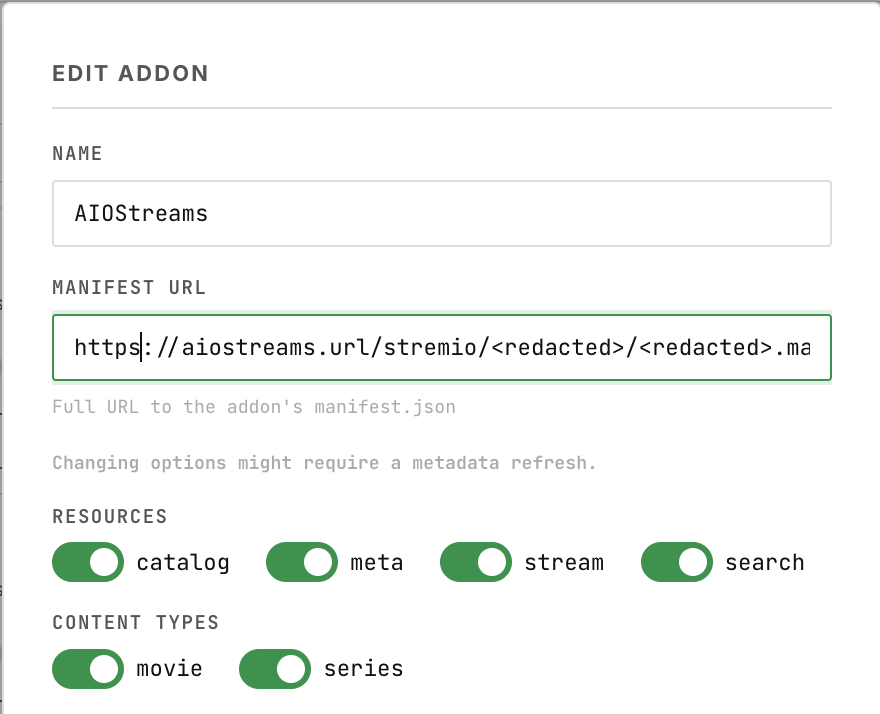
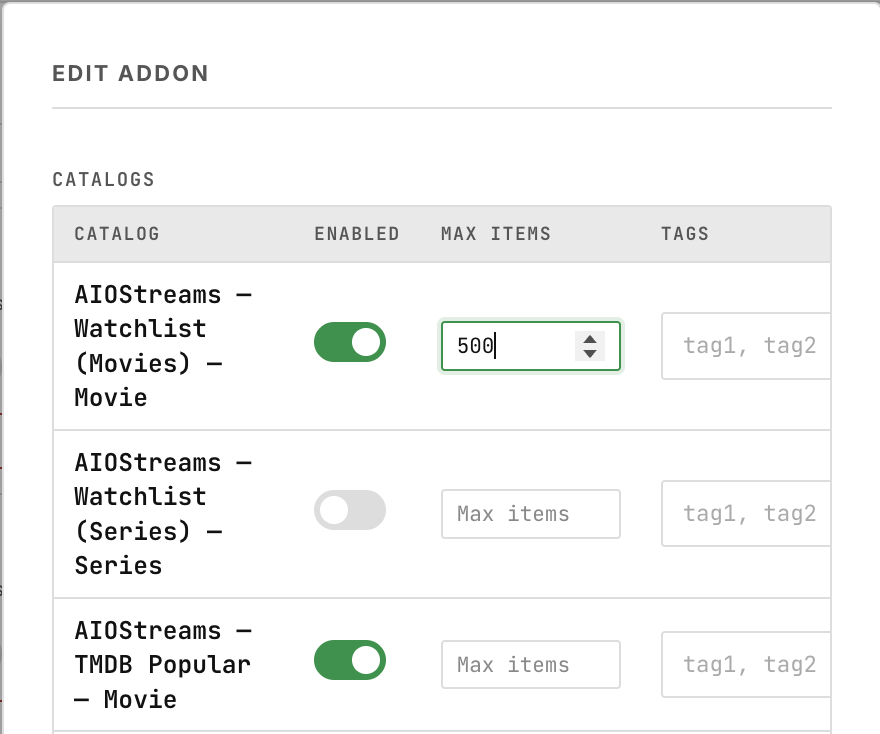
The addon will now appear in your addons list. You can edit it to configure various options (more about this in Remux Core Concepts).
Step 5: Test Playback
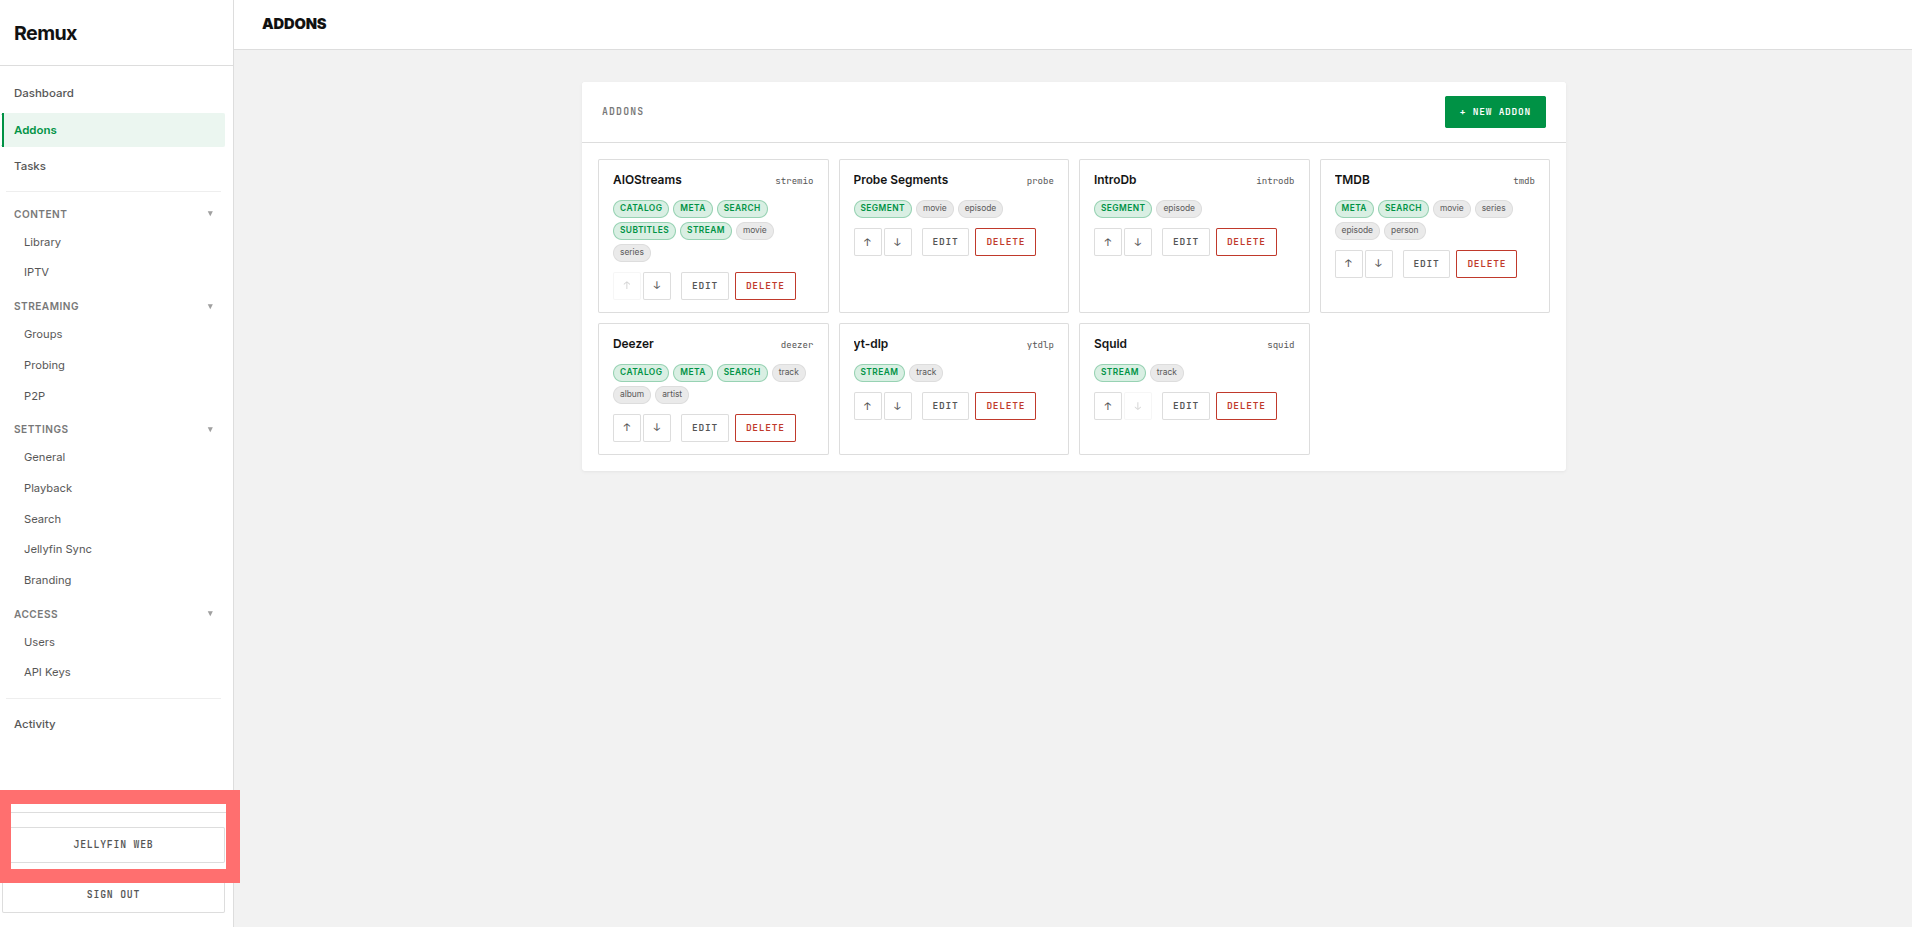
- Click Jellyfin Web in the bottom of the left sidebar
- This launches the bundled web player
- Click the search icon in the top-right corner
- Search for content (movie, TV show, etc.)
- Attempt playback
You should see search results from AIOStreams and playback should work.
✅ Congratulations! Your Remux setup is complete. For info on how to populate the library with content, and adding collections for filtering and showing your content, see the tasks section and the content section of the Remux Core Concepts guide.
Troubleshooting
"Can't access the dashboard"
- Verify the service is running:
docker compose ps - Check the Remux logs:
docker compose logs remux - Without Caddy, check the port mapping:
docker compose port remux 3000 - With Caddy, verify that both containers are connected to the shared network:
docker network inspect caddy-net
"No playback available"
- Verify AIOStreams is properly configured and your Debrid token is valid
- Check Remux logs:
docker compose logs remux
"Hardware acceleration not working"
- Verify your GPU group ID is correct:
getent group render - Check that
/dev/driis accessible to the container
Useful Commands
# View logs
docker logs remux

# Restart the container
docker compose restart remux

# Stop the container
docker compose down

# Update to latest version
docker compose pull && docker compose up -d
Need Help?
- 📖 Remux Docs: Check the official Remux repository
- 🐛 Report Issues: GitHub issues page
- 💬 Community: Stremio and Remux Discord communities
Caddy Setup Guide (Optional)
Set up a reverse proxy and expose Remux over the internet.
Remux Core Concepts
Understand addons, tasks, content, IPTV, and streaming in Remux.
Last updated on by @jonas-thuvesson-winberg